最近「パスキー」という言葉をよく耳にしませんか?これは、従来のパスワードに代わる、より安全で簡単な新しい認証技術です。
パスワード認証には、漏洩、使い回しによる不正アクセス、フィッシング詐欺など、多くの問題点がありました。パスキーは、これらの問題を根本的に解決するために生まれました。
とはいえ、「パスキーって具体的にどう動いているの?」と疑問に思う方も多いでしょう。
この記事では、PythonのWebフレームワークであるFlaskを使ったサーバーサイドコードと、それと通信するHTML/JavaScriptのクライアントサイドコードを題材に、パスキーの「登録」と「認証(ログイン)」という2つの重要なフローの裏側を、ステップバイステップで解説していきます。
登場人物の整理
本題に入る前に、パスキー認証に関わる登場人物を整理しましょう。
- ユーザー (User): あなたです。サービスに登録・ログインしたい人。
- ブラウザ (Client): ユーザーの操作窓口(index.htmlが動作する場所)。ChromeやSafariなど。
- 認証器 (Authenticator): 「秘密鍵」を安全に保管し、署名を実行する装置。
- プラットフォーム認証器: デバイス本体に組み込まれた認証機能。Windows Hello、macOSのTouch ID、スマートフォンのFace IDなどがこれにあたります。今回のサンプルコード(app.py)では、
AuthenticatorAttachment.PLATFORMを指定して、このタイプの認証器を要求しています。Windows PCでこれを利用する場合、あらかじめWindows Hello(PIN、顔認証、指紋認証など)を設定し、有効にしておく必要があります。 - ローミング認証器 (外部キー): YubiKeyのような、USBやNFCで接続する物理的なセキュリティキー。
- プラットフォーム認証器: デバイス本体に組み込まれた認証機能。Windows Hello、macOSのTouch ID、スマートフォンのFace IDなどがこれにあたります。今回のサンプルコード(app.py)では、
- サーバー (Relying Party – RP): サービス提供者(app.pyが動作する場所)。「公開鍵」を保管し、ユーザーの認証を検証します。
パスキーの核心は「公開鍵暗号」です。
ユーザー登録時に「秘密鍵」と「公開鍵」のペアが作られ、「秘密鍵」は認証器の中に安全に保管されます。一方、「公開鍵」だけがサーバーに登録されます。
ログイン時は、サーバーが送る「課題(チャレンジ)」に対し、認証器が「秘密鍵」で署名し、サーバーはそれを「公開鍵」で検証することで本人確認を行います。
それでは、この基本原則を念頭に、2つのメインフローを見ていきましょう。
事前準備と環境構築
今回の環境
- Python 3.13
- flaskライブラリ (
pip installflask) - webauthnライブラリ(
pip install webauthn) - Windows 11
重要な設定項目
Python内の設定項目
# app.py内で設定すべき主要な値
RP_ID = "localhost"  # 本番環境では実際のドメイン名
RP_NAME = "パスキーデモサイト"
origin = f"http://{RP_ID}:5000" # HTTPSが必須注意: WebAuthn APIはセキュリティ上、HTTPS環境でのみ動作します(localhostは例外的にHTTPが使えます)。本番環境では必ず有効なSSL証明書を設定してください。
なお、記のデモプログラムはサーバー機能もローカルで動かす仕様でhttp://localhost:5000で動作しますが、IPアドレス指定のhttp://127.0.0.1:5000はエラーとなります。
パスキーが使える条件
1. 「パスキー」を利用できる基本条件
ブラウザ側条件(実際にパスキーを使える最低バージョン)
| ブラウザ | パスキー対応開始バージョン | 備考 |
|---|---|---|
| Chrome | 108+ | Googleアカウント同期のパスキー対応(2022年末) |
| Safari | 16+ | macOS Ventura / iOS 16 以降で正式対応 |
| Edge | 108+ | Chromiumベース、Chromeと同等機能 |
| Firefox | 122+ | 2023年12月にパスキー対応(Credential Manager API) |
2. OS側の条件(パスキー保存・同期の可否)
| OS | パスキー対応開始 | 保存先 |
|---|---|---|
| Windows 10/11 | Windows 10 1903以降(実用は11) | Windows Hello(PIN/生体)+Microsoftアカウント同期 |
| macOS | Ventura (13) 以降 | iCloudキーチェーン |
| iOS / iPadOS | 16 以降 | iCloudキーチェーン |
| Android | Android 9 (Pie) 以降。同期可能なパスキー”を前提とするなら14 以降 | Googleアカウント経由でパスキー同期 |
3. 設定の条件(ユーザー設定で無効化されていると不可)
- OSで生体認証(またはPIN)を設定済みであること(Windows Hello、Touch IDなど)。
→ FIDO2/パスキーは「ローカル認証器(Authenticator)」を前提としています。 - アカウント同期が有効であること(例:iCloudまたはGoogleアカウント)。
→ これによりデバイス間でパスキーが共有可能になります。
サンプルコードの画面イメージ

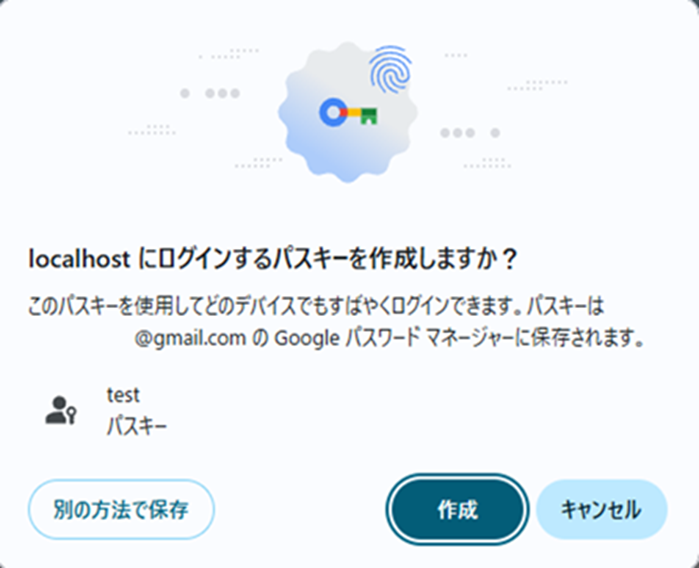
最初はusernameを入力して、Registgerボタンを押下します。
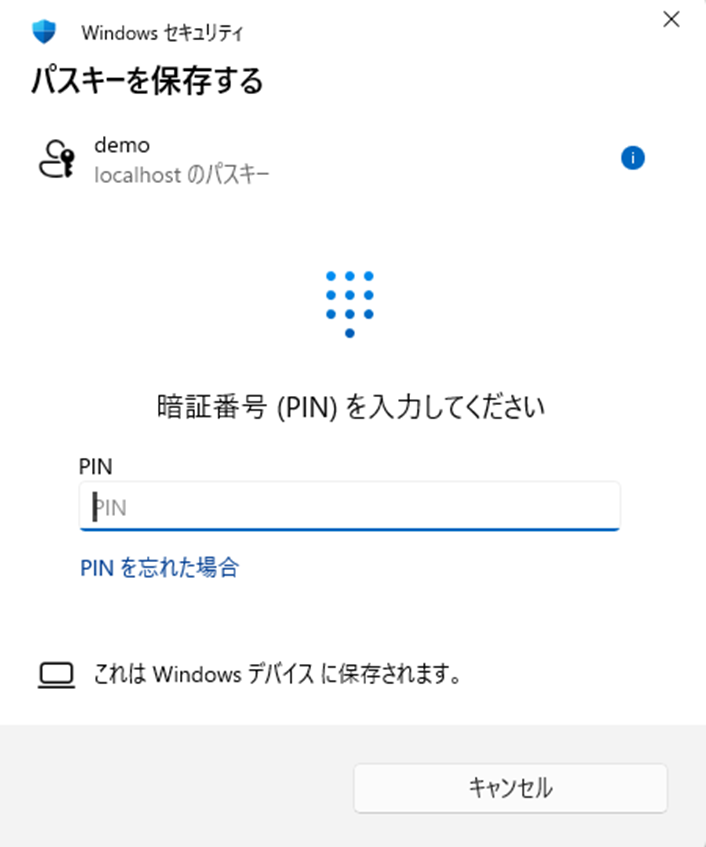
私のWindows環境では、OSログイン時にWindows Helloを利用している為、Registerボタン押下後にパスキーの保存先に①Googleパスワードマネージャーと、②Windows Helloの2つ表示れました。
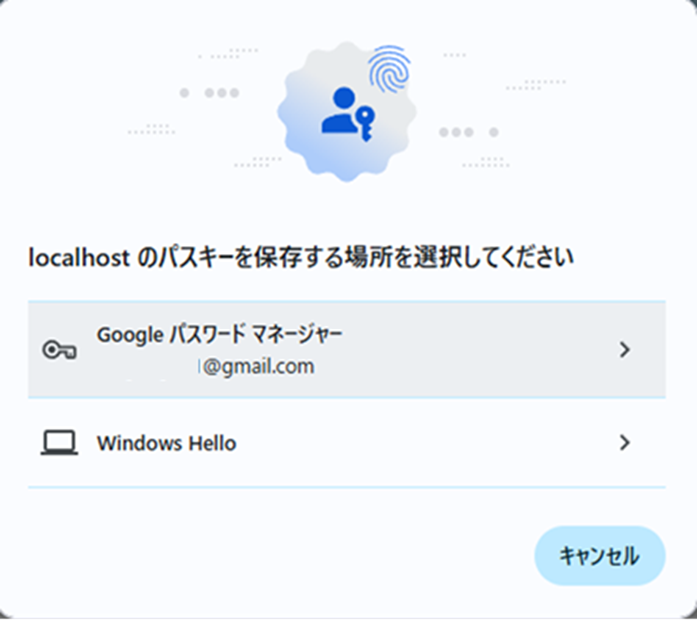
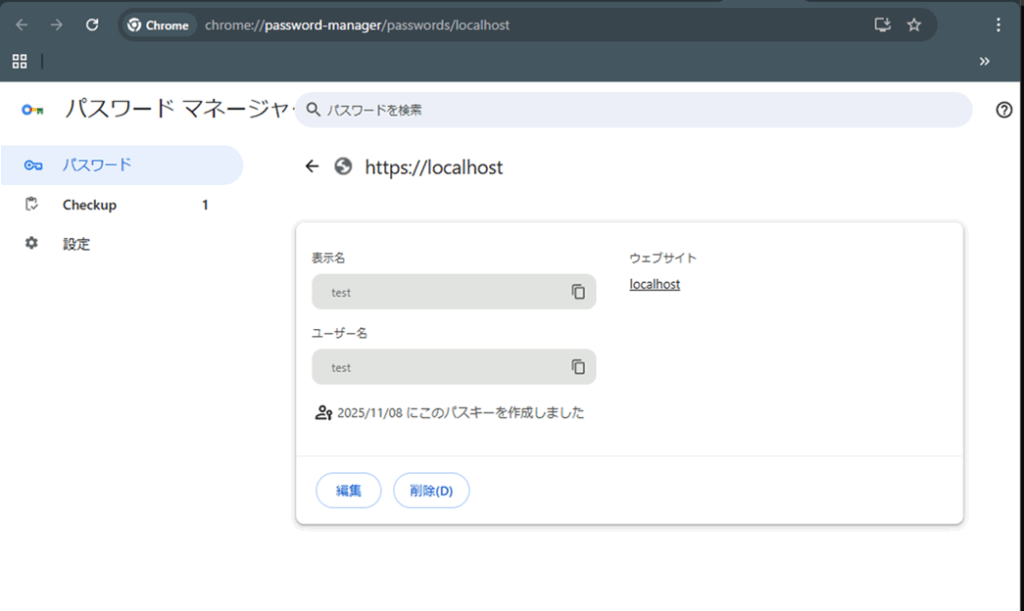
①Googleパスワードマネージャーにパスキーを保存する場合
Googleパスワードマネージャーに保存したユーザー情報は、次のURLで確認できる。不要になった場合もここから削除する。
chrome://password-manager/passwords
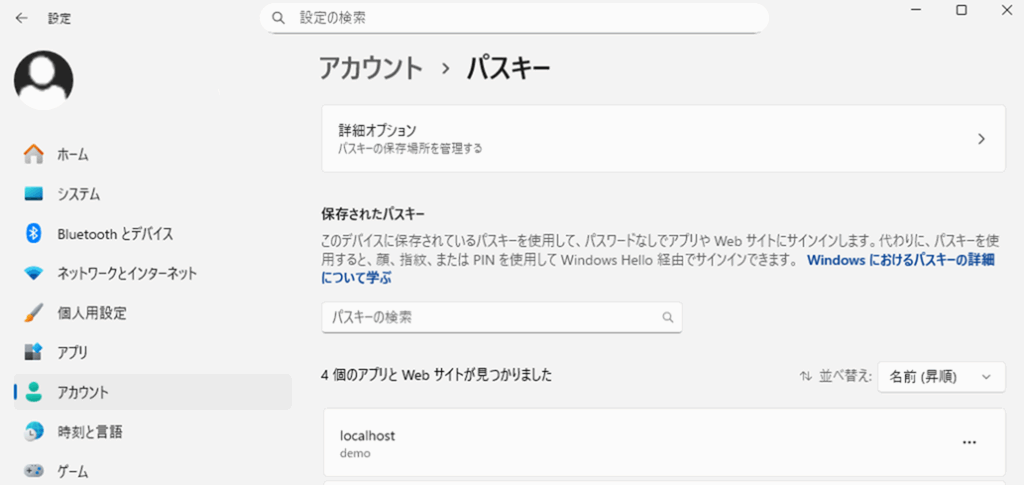
②Windows Helloにパスキーを保存する場合
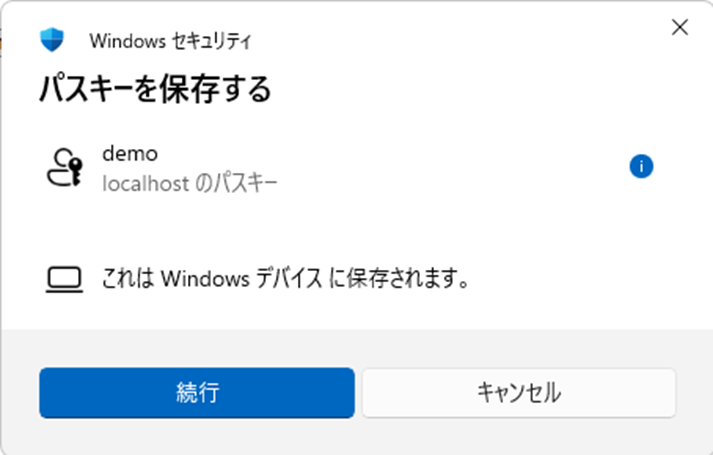
Windows Helloに保存したユーザー情報は、次の設定画面で確認できる。不要になった場合もここから削除する。
ユーザー登録後のメイン画面

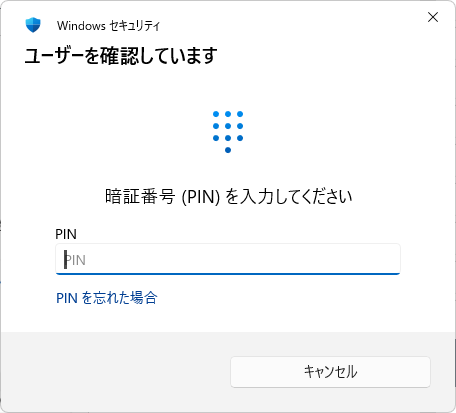
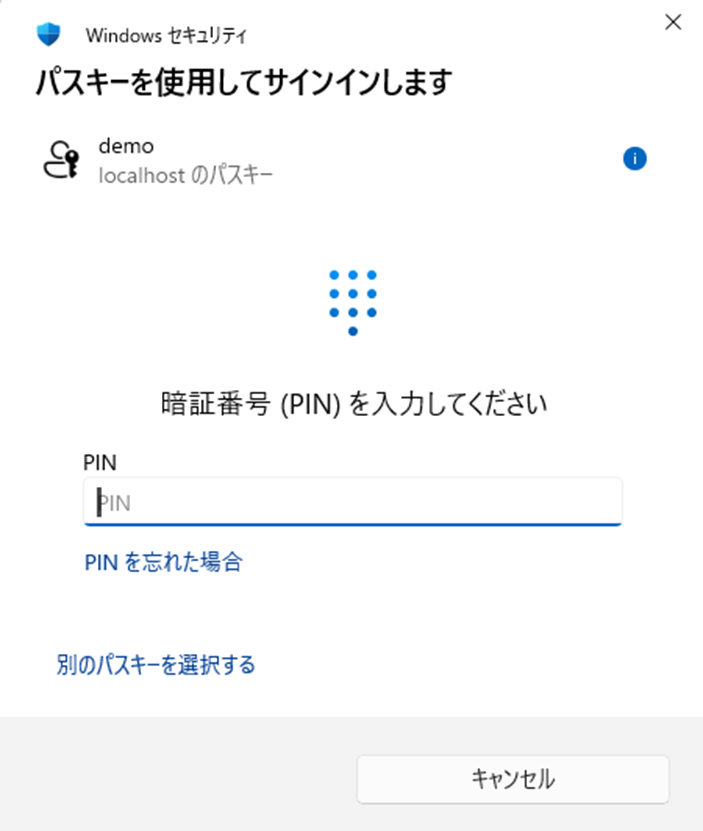
Authenticateボタンを押下して認証開始
フロー1:パスキー登録(ユーザー登録)
ユーザーが初めてサービスに登録する際のフローです。サーバー側の/generate-registration-optionsと/verify-registration、ブラウザ側のregister-buttonのクリックイベントが連携して動作します。
下のサンプルコードと見比べながらご確認ください。
[パスキー登録フロー図]
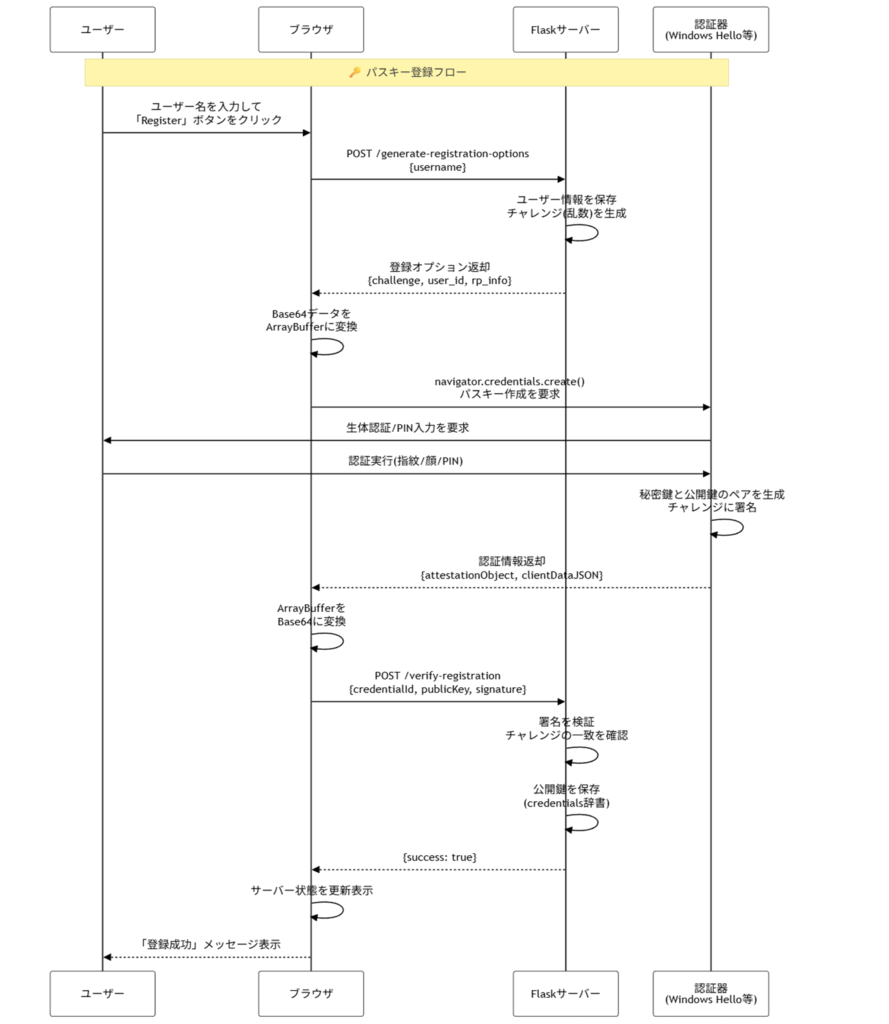
ステップ1-1:[サーバー] 登録オプションの生成 (/generate-registration-options)
ユーザーがindex.htmlで「ユーザー名」を入力して「登録」ボタンを押すと、リクエストがサーバーの/generate-registration-optionsに送られます。
- サーバーは、そのユーザー名がまだ登録されていないことを確認します。
webauthnライブラリのgenerate_registration_options関数を呼び出します。- この関数は、「チャレンジ」と呼ばれる使い捨てのランダムな文字列を生成します。これは、今まさに登録しようとしているリクエストであることを証明するための「合い言葉」のようなものです。
- また、「どんな認証器を要求するか」(コードでは
authenticator_attachment=AuthenticatorAttachment.PLATFORMで、PCやスマホ本体の認証機能(Face IDなど)を指定)といった設定も生成します。 - サーバーは、後で検証に使うため、この「チャレンジ」をセッションに一時保存し、生成したオプション全体をJSONとしてブラウザに返します。
補足: チャレンジは通常32バイト以上のランダムデータで、リプレイ攻撃を防ぐために一度しか使えません。セッションに保存する際は有効期限(推奨5分以内)を設定しましょう。
ステップ1-2:[ブラウザ + 認証器] 鍵ペアの生成と署名 (index.html)
- ブラウザ(index.htmlのJavaScript)は、サーバーから受け取ったJSONオプションを受け取ります。
base64ToArrayBufferヘルパー関数を使い、サーバーから送られたBase64文字列の「チャレンジ」や「ユーザーID」を、ブラウザのAPIが要求するArrayBuffer形式(バイナリデータ)に変換します。- 変換したオプションを、JavaScriptの
navigator.credentials.create({ publicKey: options })関数に渡します。 - OSがこれを検知し、認証器(Windows HelloやFace IDなど)が起動します。ユーザーは生体認証やPIN入力を求められます。
- ユーザーが許可すると、認証器は新しい「秘密鍵」と「公開鍵」のペアを生成します。
- 「秘密鍵」は認証器内の安全な領域(セキュアエンクレーブなど)に即座に保存されます。
- 認証器は、サーバーから送られた「チャレンジ」やサービスのドメイン(RP_ID)などを含むデータに、今作った「秘密鍵」で署名します。
- ブラウザは、認証器が作った「公開鍵」と「署名データ(attestation)」を、今度は
arrayBufferToBase64ヘルパー関数でBase64文字列に変換し、サーバーに送り返します。
補足: attestationオプションで、認証器の真正性をどこまで検証するか制御できます:
none: 検証不要(最も一般的)indirect: 間接的な検証direct: 認証器の証明書を完全検証(企業環境向け)
ステップ1-3:[サーバー] 検証と公開鍵の保存 (/verify-registration)
- ブラウザからのデータは、サーバーの
/verify-registrationに送られます。 - サーバーはまず、セッションに保存していた「チャレンジ」を取り出します。
verify_registration_response関数を使って、送られてきたデータを検証します。- データ内の「チャレンジ」が、セッションに保存したものと一致するか?
- 「署名」は、同封された「公開鍵」で正しく検証できるか?
- リクエストのドメイン(Origin)は、期待通り(RP_ID)か?(フィッシング対策の要!)
- すべての検証が成功したら、サーバーは「この登録は正当だ」と判断します。
- サーバーの
credentials辞書(本番環境ではデータベース)に、「公開鍵」と、それを識別するための「認証情報ID (Credential ID)」、そして「ユーザーID」を紐づけて保存します。
データベーススキーマの例:
sql
CREATE TABLE credentials (
    id VARCHAR(255) PRIMARY KEY,  -- Credential ID
    user_id VARCHAR(255) NOT NULL,
    public_key TEXT NOT NULL,
    sign_count INTEGER DEFAULT 0,
    created_at TIMESTAMP DEFAULT CURRENT_TIMESTAMP,
    last_used_at TIMESTAMP
);
これで登録は完了です。サーバーはパスワードを一切保存しておらず、ユーザーの「公開鍵」だけを知っている状態になりました。
フロー2:パスキー認証(ログイン)
次に、既に登録済みのユーザーがログインする際のフローです。サーバー側の/generate-authentication-optionsと/verify-authentication、ブラウザ側のauthenticate-buttonのクリックイベントが連携します。
下のサンプルコードと見比べながらご確認ください。
[パスキー認証フロー図]
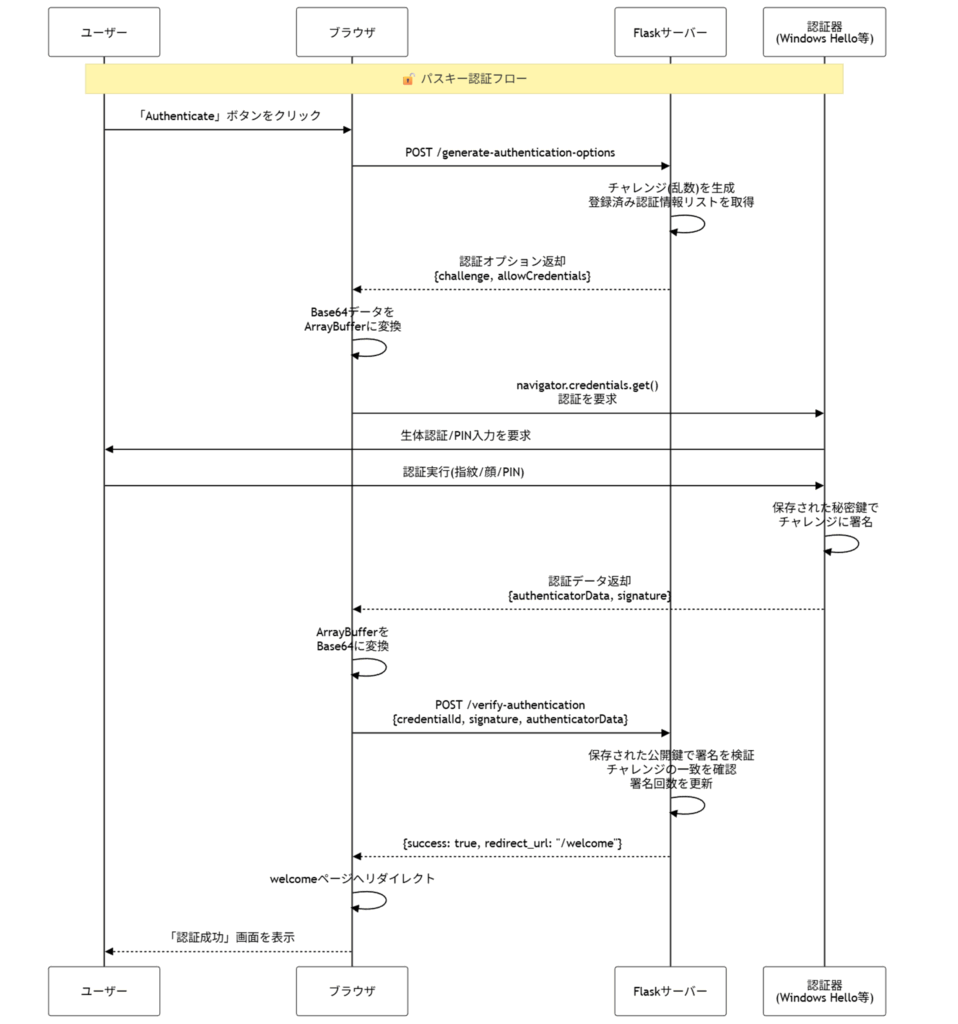
ステップ2-1:[サーバー] 認証オプションの生成 (/generate-authentication-options)
- ユーザーがindex.htmlで「ログイン」ボタンを押すと、リクエストが
/generate-authentication-optionsに送られます。 - サーバーは、登録フローの時と同様に
generate_authentication_options関数を使って、新しい「チャレンジ」を生成します。 - 今回は、サーバーは「どのパスキーでログインしようとしているか」をブラウザに伝えるため、データベース(
credentials辞書)に保存されている「認証情報ID」のリストもオプションに含めます。 - 「チャレンジ」をセッションに保存し、オプションをJSONとしてブラウザに返します。
実装のバリエーション:
- ユーザー名なしログイン:
allowCredentialsを空にすれば、ユーザー名入力不要の「パスワードレス」体験が可能 - 複数デバイス対応: 同一ユーザーの複数のCredential IDを返すことで、どのデバイスでもログイン可能に
ステップ2-2:[ブラウザ + 認証器] 署名の生成 (index.html)
- ブラウザ(index.html)は、サーバーからのオプションを受け取ります。
base64ToArrayBufferを使って、「チャレンジ」や「認証情報ID」をArrayBuffer形式に変換します。- 変換したオプションをJavaScriptの
navigator.credentials.get({ publicKey: options })関数に渡します。 - サーバーから「認証情報ID」のリストが指定されているため、認証器はそれに対応する「秘密鍵」を持っているか探しに行きます。
- 該当する「秘密鍵」が見つかると、認証器が起動し、ユーザーに生体認証やPINを要求します。
- ユーザーが許可すると、認証器はサーバーから送られた「チャレンジ」を含むデータに、登録時に保存した「秘密鍵」で署名します。
- ブラウザは、認証器が作った「署名データ(assertion)」を
arrayBufferToBase64でBase64文字列に変換し、サーバーに送り返します。
ステップ2-3:[サーバー] 署名の検証とログイン (/verify-authentication)
- ブラウザは、認証器が作った「署名データ(assertion)」をサーバーの
/verify-authenticationに送り返します。 - サーバーはセッションから「チャレンジ」を取り出します。
- 送られてきたデータに含まれる「認証情報ID」を使い、データベース(
credentials辞書)から対応する「公開鍵」と、前回ログイン時の「署名回数(sign_count)」を取得します。(署名回数は、同じ署名が使い回される「リプレイ攻撃」を防ぐためにチェックされます)。 verify_authentication_response関数を使って、署名を検証します。- データ内の「チャレンジ」は、セッションのものと一致するか?
- 「署名」は、データベースに保存されていた「公開鍵」で正しく検証できるか?
- 「署名回数」は、保存されている回数より大きいか?
- すべての検証が成功したら、サーバーは「このユーザーは、登録された秘密鍵を持つ本人である」と確信できます。
- サーバーは新しい「署名回数」をデータベースに保存し、認証成功のJSON(welcome.htmlへのリダイレクトURLを含む)を返します。
- ブラウザ(index.html)は、このJSONを受け取り、
window.location.hrefを使ってwelcome.htmlに画面遷移させます。
セッション管理のベストプラクティス:
- 認証成功後は、新しいセッションIDを発行(セッション固定攻撃対策)
- セッションに認証レベルやタイムスタンプを記録
- 重要な操作前に再認証を要求する仕組みも検討
セキュリティの重要ポイント
1. Origin検証の重要性
サーバー側で必ずOriginを検証することで、フィッシングサイトでの認証試行を完全にブロックできます。これはパスキーの最大の強みです。
python
# 正しいOriginの検証例
if verification.origin != EXPECTED_ORIGIN:
    raise ValueError("Invalid origin")
2. チャレンジの一回限り使用
同じチャレンジを再利用されるリプレイ攻撃を防ぐため、検証後は必ずセッションから削除してください。
3. ユーザー検証(User Verification)
userVerificationパラメータで、生体認証やPINの要求レベルを制御:
required: 必須(金融系アプリ推奨)preferred: 推奨(デフォルト)discouraged: 不要(低セキュリティ用途)
4. タイムアウト設定
認証器の応答に適切なタイムアウトを設定(推奨60秒)。長すぎるとUX低下、短すぎると認証失敗が増加します。
トラブルシューティング
よくあるエラーと対処法
エラー: “NotAllowedError: The operation either timed out or was not allowed”
- 原因: ユーザーが認証をキャンセル、または認証器が応答しない
- 対処: タイムアウト時間を延長、またはユーザーに再試行を促す
エラー: “SecurityError: The operation is insecure”
- 原因: HTTPで実行している(HTTPS必須)
- 対処: HTTPS環境に移行、または開発時は
localhostを使用
エラー: “InvalidStateError: The authenticator has an excluded credential”
- 原因: 同じ認証器で既に登録済み
- 対処:
excludeCredentialsパラメータで既存のCredential IDを除外
エラー: “NotSupportedError: The authenticator does not support this operation”
- 原因: 使用中の認証器が要求された機能に非対応
- 対処:
authenticatorSelectionの要件を緩和、または別の認証器を使用
デバッグのヒント
- Chrome DevToolsの「Application」タブ → 「WebAuthn」でエミュレータを使用
- サーバーログで
challengeとoriginの値を確認 - ブラウザのコンソールで
navigator.credentialsの挙動を確認
実装時の注意点とベストプラクティス
1. フォールバック戦略
すべてのユーザーがパスキー対応デバイスを持っているとは限りません。従来のパスワードやSMS認証との併用も検討しましょう。
2. ユーザー体験の最適化
- 初回登録時に「パスキーとは何か」を簡潔に説明
- 登録済みデバイスの管理画面を提供(デバイス名、最終使用日時など)
- 複数デバイスの登録を推奨
3. 本番環境への移行チェックリスト
- HTTPSが正しく設定されているか
- RP_IDが実際のドメインと一致しているか
- データベースに適切なインデックスが設定されているか
- セッション管理が安全に実装されているか
- エラーハンドリングが適切か
- ログとモニタリングが設定されているか
4. パフォーマンス最適化
- 公開鍵のシリアライズ形式を最適化(CBOR推奨)
- データベースクエリを最小化(適切なキャッシング)
- 非同期処理の活用
5. アクセシビリティ
- キーボード操作のサポート
- スクリーンリーダー対応
- わかりやすいエラーメッセージ
まとめ
コードを通してパスキーの仕組みを見てきました。重要なポイントをまとめます。
✅ 登録フローとは、認証器が「鍵ペア」を作り、サーバーに「公開鍵」を預けるプロセスのことです。
✅ 認証フローとは、サーバーが「チャレンジ」を出し、認証器が「秘密鍵」でそれに署名し、サーバーが「公開鍵」でそれを検証するプロセスのことです。
✅ 「秘密鍵」はデバイスから一切出ません。 これにより、サーバーがハッキングされてもパスワードのように認証情報が盗まれることがありません。
✅ 認証はRP_ID(ドメイン名)と強く紐づいているため、偽サイトに誘導されても認証が失敗し、フィッシング詐欺が原理的に不可能になります。
✅ index.htmlのJavaScriptは、サーバー(Base64文字列)とブラウザAPI(ArrayBuffer)の間のデータ形式を変換する「通訳」として重要な役割を担っています。
パスキーのメリット・デメリット
ここでパスキーのメリット・デメリットをまとめます。
メリット:
- パスワード漏洩のリスクゼロ
- フィッシング詐欺に強い
- ユーザー体験の向上(パスワード記憶不要)
- 多要素認証が一体化
デメリット(注意点):
- デバイス紛失時のリカバリー計画が必要
- 古いブラウザ/OSは非対応
- ユーザー教育が必要
参考リンク
【サンプルコード:app.py】
# ライブラリのインポート
import os
import json
import base64
from flask import Flask, request, jsonify, render_template, session
from urllib.parse import urlparse
# webauthnライブラリから必要な関数とデータ構造をインポート
from webauthn import (
    generate_registration_options,
    verify_registration_response,
    generate_authentication_options,
    verify_authentication_response,
    options_to_json,
)
from webauthn.helpers.structs import (
    RegistrationCredential,
    AuthenticationCredential,
    AuthenticatorSelectionCriteria,
    UserVerificationRequirement,
    AuthenticatorAttachment,
    AuthenticatorAttestationResponse,
    AuthenticatorAssertionResponse,
)

# Flaskアプリケーションの初期化
app = Flask(__name__)
# セッション情報を暗号化するための秘密鍵。Flaskでは必須。
app.config["SECRET_KEY"] = os.urandom(32)

# サーバー側で発生した予期せぬエラーをハンドルし、JSON形式でエラーメッセージを返す
@app.errorhandler(Exception)
def handle_exception(e):
    print(f"CRITICAL ERROR: {e}")
    import traceback
    traceback.print_exc()
    return jsonify({"fail": f"Server error: {str(e)}"}), 500

# --- データストア ---
# 本来はデータベースに保存するが、このデモではサーバーのメモリ上に情報を一時的に保存する
# ユーザー情報を保存する辞書
users = {}
# 認証情報(公開鍵など)を保存する辞書
credentials = {}

# --- WebAuthn設定 ---
# Relying Party (RP) の設定。RPとは、WebAuthnを利用するウェブサイトやサービスのこと。
# RP名:ユーザーに表示されるサービス名
RP_NAME = "Passkey Demo"
# RP ID:サービスを識別するためのドメイン名。今回はlocalhostに固定。
RP_ID = "localhost"

def base64_to_bytes(data):
    """フロントエンドから送られてくるURL-safeなbase64文字列を、Pythonで扱えるバイト列に変換するヘルパー関数"""
    if isinstance(data, str):
        # base64として正しくデコードするために、パディング('=')を追加する
        missing_padding = len(data) % 4
        if missing_padding:
            data += '=' * (4 - missing_padding)
        # URL-safeな文字('-', '_')を標準のbase64文字('+', '/')に置換する
        data = data.replace('-', '+').replace('_', '/')
        return base64.b64decode(data)
    return data

# --- Flaskルーティング ---

# メインページを表示
@app.route("/")
def index():
    return render_template("index.html")

# サーバーに保存されているデータを表示するためのAPI
@app.route("/get-server-data")
def get_server_data():
    # バイトデータを16進数文字列に変換してJSONで返せるようにする
    serializable_credentials = {}
    for cred_id, cred_data in credentials.items():
        serializable_credentials[cred_id.hex()] = {
            "public_key": cred_data["public_key"].hex() if cred_data["public_key"] else None,
            "sign_count": cred_data["sign_count"],
            "user_id": cred_data["user_id"].hex() if cred_data["user_id"] else None,
        }

    serializable_users = {}
    for username, user_data in users.items():
        serializable_users[username] = {
            "id": user_data["id"].hex()
        }

    return jsonify({
        "users": serializable_users,
        "credentials": serializable_credentials,
    })

# 認証成功時に表示されるウェルカムページ
@app.route("/welcome")
def welcome():
    return render_template("welcome.html")


# --- Passkey登録フロー ---

# ステップ1:登録オプションの生成
@app.route("/generate-registration-options", methods=["POST"])
def registration_options():
    username = request.json["username"]
    # ユーザーが既に存在する場合はエラー
    if username in users:
        return jsonify({"fail": "User already exists"}), 400

    # ユーザー情報をメモリに保存
    user_id = os.urandom(32)
    users[username] = {"id": user_id}

    # webauthnライブラリを使い、ブラウザに渡すための登録オプションを生成する
    options = generate_registration_options(
        rp_id=RP_ID,
        rp_name=RP_NAME,
        user_id=user_id,
        user_name=username,
        # 認証器の選択基準を設定
        authenticator_selection=AuthenticatorSelectionCriteria(
            # プラットフォーム認証器(Windows Hello, Face ID, Touch IDなど)を要求
            authenticator_attachment=AuthenticatorAttachment.PLATFORM,
            # ユーザー検証(PINや生体認証)を必須とする
            user_verification=UserVerificationRequirement.REQUIRED,
        ),
    )

    # 後続の検証ステップで使うため、生成したチャレンジ(乱数)と現在のユーザー名をセッションに保存
    session["challenge"] = options.challenge
    session["registration_username"] = username
    # 生成したオプションをJSON形式でフロントエンドに返す
    return options_to_json(options)


# ステップ2:登録の検証
@app.route("/verify-registration", methods=["POST"])
def verify_registration():
    # RP IDとオリジン(生成元)を設定
    rp_id = RP_ID
    origin = f"http://{RP_ID}:5000"

    # ステップ1で保存したチャレンジをセッションから取り出す
    challenge = session.pop("challenge", None)
    if not challenge:
        return jsonify({"fail": "No challenge found in session"}), 400

    try:
        # フロントエンドから送られてきたJSONデータを手動で解析し、
        # webauthnライブラリが要求するRegistrationCredentialオブジェクトを構築する
        credential_data = request.json.copy()
        credential_data['raw_id'] = base64_to_bytes(credential_data.pop('rawId'))

        response_data = credential_data['response']
        response_data['attestationObject'] = base64_to_bytes(response_data.pop('attestationObject'))
        response_data['clientDataJSON'] = base64_to_bytes(response_data.pop('clientDataJSON'))

        response = AuthenticatorAttestationResponse(
            attestation_object=response_data.get('attestationObject'),
            client_data_json=response_data.get('clientDataJSON')
        )

        credential = RegistrationCredential(
            id=credential_data.get('id'),
            raw_id=credential_data.get('raw_id'),
            type=credential_data.get('type', 'public-key'),
            response=response
        )

        # webauthnライブラリを使い、ブラウザから送られてきた認証情報を検証する
        # この関数が、署名の正当性やチャレンジの一致などを暗号学的に検証する
        verified_credential = verify_registration_response(
            credential=credential,
            expected_challenge=challenge,
            expected_origin=origin,
            expected_rp_id=rp_id,
        )

        # セッションから登録中のユーザー名を取得
        username = session.pop("registration_username", None)
        if not username or username not in users:
            return jsonify({"fail": "Could not find user session for this registration"}), 400

        user_id = users[username]["id"]

        # 検証が成功したら、新しい認証情報(公開鍵など)をサーバーに保存する
        credential_id_bytes = verified_credential.credential_id
        credentials[credential_id_bytes] = {
            "public_key": verified_credential.credential_public_key,
            "sign_count": verified_credential.sign_count,
            "user_id": user_id,  # ユーザーIDを認証情報に紐付ける
        }
        return jsonify({"success": "Registration successful"})
    except Exception as e:
        import traceback
        traceback.print_exc()
        return jsonify({"fail": f"Registration failed: {e}"}), 400


# --- Passkey認証フロー ---

# ステップ1:認証オプションの生成
@app.route("/generate-authentication-options", methods=["POST"])
def authentication_options():
    from webauthn.helpers.structs import PublicKeyCredentialDescriptor

    rp_id = RP_ID

    # サーバーに登録済みの認証情報IDのリストを作成する
    # これにより、ブラウザはどのパスキーを提示すべきかを知ることができる
    allow_credentials = []
    for credential_id in credentials.keys():
        from webauthn.helpers.structs import PublicKeyCredentialType
        allow_credentials.append(
            PublicKeyCredentialDescriptor(
                id=credential_id,
                type=PublicKeyCredentialType.PUBLIC_KEY
            )
        )

    # webauthnライブラリを使い、ブラウザに渡すための認証オプションを生成する
    options = generate_authentication_options(
        rp_id=rp_id,
        user_verification=UserVerificationRequirement.REQUIRED,
        allow_credentials=allow_credentials,
    )
    # 後続の検証ステップで使うため、チャレンジをセッションに保存
    session["challenge"] = options.challenge
    return options_to_json(options)


# ステップ2:認証の検証
@app.route("/verify-authentication", methods=["POST"])
def verify_authentication():
    rp_id = RP_ID
    origin = f"http://{RP_ID}:5000"

    challenge = session.pop("challenge", None)
    if not challenge:
        return jsonify({"fail": "No challenge found in session"}), 400

    try:
        # フロントエンドから送られてきたJSONデータを手動で解析し、
        # webauthnライブラリが要求するAuthenticationCredentialオブジェクトを構築する
        credential_data = request.json.copy()
        credential_data['raw_id'] = base64_to_bytes(credential_data.pop('rawId'))

        response_data = credential_data['response']
        response_data['authenticatorData'] = base64_to_bytes(response_data.pop('authenticatorData'))
        response_data['clientDataJSON'] = base64_to_bytes(response_data.pop('clientDataJSON'))
        response_data['signature'] = base64_to_bytes(response_data.pop('signature'))
        if response_data.get('userHandle'):
            response_data['userHandle'] = base64_to_bytes(response_data['userHandle'])

        response = AuthenticatorAssertionResponse(
            authenticator_data=response_data.get('authenticatorData'),
            client_data_json=response_data.get('clientDataJSON'),
            signature=response_data.get('signature'),
            user_handle=response_data.get('userHandle')
        )

        credential = AuthenticationCredential(
            id=credential_data.get('id'),
            raw_id=credential_data.get('raw_id'),
            type=credential_data.get('type', 'public-key'),
            response=response
        )
        credential_id_bytes = credential.raw_id

        # 提示された認証情報IDがサーバーに存在するかチェック
        if credential_id_bytes not in credentials:
            return jsonify({"fail": "Credential not found. This demo stores credentials in memory, which are lost when the server restarts."}), 404

        # サーバーに保存されている公開鍵と署名回数を取得
        stored_credential = credentials[credential_id_bytes]

        # webauthnライブラリを使い、認証を検証する
        # 保存済みの公開鍵を使って署名を検証し、チャレンジが一致することを確認する
        verified_credential = verify_authentication_response(
            credential=credential,
            expected_challenge=challenge,
            expected_origin=origin,
            expected_rp_id=rp_id,
            credential_public_key=stored_credential["public_key"],
            credential_current_sign_count=stored_credential["sign_count"],
        )

        # リプレイ攻撃を防ぐため、認証器から返された新しい署名回数でサーバーの値を更新する
        stored_credential["sign_count"] = verified_credential.new_sign_count

        # 認証成功、ウェルカムページへのリダイレクトURLを返す
        return jsonify({"success": True, "redirect_url": "/welcome"})
    except Exception as e:
        import traceback
        traceback.print_exc()
        return jsonify({"fail": f"Authentication failed: {e}"}), 400


# アプリケーションの実行
if __name__ == "__main__":
    # localhostでのみリクエストを受け付けるように設定
    app.run(debug=True, host="localhost", port=5000)
【サンプルコード:templates/index.html】
<!DOCTYPE html>
<html>
<head>
    <title>Passkey Demo</title>
    <style>
        .message {
            padding: 10px;
            margin: 10px 0;
            border-radius: 4px;
            font-family: monospace;
            word-wrap: break-word;
        }
        .error {
            background-color: #ffebee;
            border: 1px solid #f44336;
            color: #c62828;
        }
        .success {
            background-color: #e8f5e8;
            border: 1px solid #4caf50;
            color: #2e7d32;
        }
        .info {
            background-color: #e3f2fd;
            border: 1px solid #2196f3;
            color: #1565c0;
        }
        body {
            font-family: Arial, sans-serif;
            max-width: 600px;
            margin: 0 auto;
            padding: 20px;
        }
    </style>
</head>
<body>
    <h1>Passkey Demo</h1>

    <div style="background-color: #fffbe6; border: 1px solid #ffc107; padding: 10px; border-radius: 4px; margin-bottom: 20px;">
      <strong>Note:</strong> Please use <code>http://localhost:5000</code> to access this page. Using 127.0.0.1 may cause errors.
    </div>

    <!-- Message display area -->
    <div id="message-area"></div>

    <div>
        <h2>Register</h2>
        <input type="text" id="username" placeholder="Enter username">
        <button id="register-button">Register</button>
    </div>
    <div>
        <h2>Authenticate</h2>
        <button id="authenticate-button">Authenticate</button>
    </div>

    <hr>

    <div>
        <h2>Server State</h2>
        <p style="font-size: small; color: #555;">(Note: This is an in-memory store. Data will be lost on server restart.)</p>
        <h3>Users</h3>
        <pre id="server-users" style="background-color: #f5f5f5; padding: 10px; border-radius: 4px;"></pre>
        <h3>Credentials</h3>
        <pre id="server-credentials" style="background-color: #f5f5f5; padding: 10px; border-radius: 4px;"></pre>
    </div>

    <script>
        // --- UI制御 ---

        // 画面上部にメッセージを表示する関数
        function showMessage(message, type = 'info') {
            const messageArea = document.getElementById('message-area');
            const messageDiv = document.createElement('div');
            messageDiv.className = `message ${type}`;
            messageDiv.textContent = message;
            messageArea.appendChild(messageDiv);

            // 成功メッセージは5秒後に自動で消す
            if (type === 'success') {
                setTimeout(() => {
                    if (messageDiv.parentNode) {
                        messageDiv.parentNode.removeChild(messageDiv);
                    }
                }, 5000);
            }
        }

        // 表示されているメッセージを全て消去する関数
        function clearMessages() {
            const messageArea = document.getElementById('message-area');
            messageArea.innerHTML = '';
        }

        // --- サーバー状態表示 ---
        const usersPre = document.getElementById('server-users');
        const credentialsPre = document.getElementById('server-credentials');

        // サーバーからデータを取得して画面に表示する関数
        async function refreshServerState() {
            try {
                const resp = await fetch('/get-server-data');
                const data = await resp.json();
                // JSON.stringifyの第2,第3引数で見やすく整形して表示
                usersPre.textContent = JSON.stringify(data.users, null, 2);
                credentialsPre.textContent = JSON.stringify(data.credentials, null, 2);
            } catch (e) {
                usersPre.textContent = "Failed to load server state.";
                credentialsPre.textContent = "Failed to load server state.";
            }
        }

        // ページの初回読み込み時にもサーバー状態を表示
        document.addEventListener('DOMContentLoaded', refreshServerState);


        // --- WebAuthn データ変換ヘルパー ---

        // ArrayBufferをBase64文字列に変換する
        // credential.rawIdなどをサーバーに送るために使用
        function arrayBufferToBase64(buffer) {
            let binary = '';
            const bytes = new Uint8Array(buffer);
            const len = bytes.byteLength;
            for (let i = 0; i < len; i++) {
                binary += String.fromCharCode(bytes[i]);
            }
            return window.btoa(binary);
        }

        // Base64文字列(URL-safe版)をArrayBufferに変換する
        // サーバーから受け取ったchallengeなどをブラウザのAPIに渡すために使用
        function base64ToArrayBuffer(base64) {
            const base64url = base64.replace(/-/g, '+').replace(/_/g, '/');
            const padding = '='.repeat((4 - base64url.length % 4) % 4);
            const binary_string = window.atob(base64url + padding);
            const len = binary_string.length;
            const bytes = new Uint8Array(len);
            for (let i = 0; i < len; i++) {
                bytes[i] = binary_string.charCodeAt(i);
            }
            return bytes.buffer;
        }

        // --- Passkey登録ボタンの処理 ---
        document.getElementById('register-button').addEventListener('click', async () => {
            try {
                clearMessages();
                const username = document.getElementById('username').value;
                if (!username) {
                    showMessage('Please enter a username', 'error');
                    return;
                }
                showMessage('Starting registration process...', 'info');

                // ステップ1: サーバーに登録オプションを要求
                const resp = await fetch('/generate-registration-options', {
                    method: 'POST',
                    headers: { 'Content-Type': 'application/json' },
                    body: JSON.stringify({ username }),
                });
                const options = await resp.json();
                if (options.fail) {
                    showMessage(`Server error: ${options.fail}`, 'error');
                    return;
                }

                // ステップ2: サーバーから受け取ったオプションを、ブラウザAPIが扱える形式(ArrayBuffer)に変換
                options.challenge = base64ToArrayBuffer(options.challenge);
                options.user.id = base64ToArrayBuffer(options.user.id);
                if (options.excludeCredentials) {
                    for (let cred of options.excludeCredentials) {
                        cred.id = base64ToArrayBuffer(cred.id);
                    }
                }

                // ステップ3: ブラウザのWebAuthn APIを呼び出し、パスキーの作成を要求
                // この呼び出しで、OSのダイアログ(Windows Helloなど)が表示される
                const credential = await navigator.credentials.create({ publicKey: options });

                // ステップ4: 作成された認証情報を、サーバーが検証できる形式(Base64文字列)に変換
                const credentialForServer = {
                    id: credential.id,
                    rawId: arrayBufferToBase64(credential.rawId),
                    type: credential.type,
                    response: {
                        attestationObject: arrayBufferToBase64(credential.response.attestationObject),
                        clientDataJSON: arrayBufferToBase64(credential.response.clientDataJSON),
                    },
                };

                // ステップ5: 変換した認証情報をサーバーに送り、検証を依頼
                const verificationResp = await fetch('/verify-registration', {
                    method: 'POST',
                    headers: { 'Content-Type': 'application/json' },
                    body: JSON.stringify(credentialForServer),
                });
                const verificationJSON = await verificationResp.json();

                // ステップ6: サーバーからの検証結果に応じてメッセージを表示
                if (verificationJSON && verificationJSON.success) {
                    showMessage('Registration successful! You can now authenticate.', 'success');
                    refreshServerState(); // サーバー状態を更新
                } else {
                    showMessage(`Registration failed: ${verificationJSON.fail || 'Unknown error'}`, 'error');
                }
            } catch (err) {
                // エラー処理
                if (err.name === 'TypeError' && err.message.includes('is not valid JSON')) {
                    showMessage('An error occurred: The server returned an unexpected response. Please check the server logs for a crash.', 'error');
                } else {
                    showMessage(`An error occurred: ${err.message}`, 'error');
                }
            }
        });

        // --- Passkey認証ボタンの処理 ---
        document.getElementById('authenticate-button').addEventListener('click', async () => {
            try {
                clearMessages();
                showMessage('Starting authentication process...', 'info');

                // ステップ1: サーバーに認証オプションを要求
                const resp = await fetch('/generate-authentication-options', { method: 'POST' });
                const options = await resp.json();
                if (options.fail) {
                    showMessage(`Server error: ${options.fail}`, 'error');
                    return;
                }

                // ステップ2: オプションをブラウザAPIが扱える形式に変換
                options.challenge = base64ToArrayBuffer(options.challenge);
                if (options.allowCredentials) {
                    for (let cred of options.allowCredentials) {
                        cred.id = base64ToArrayBuffer(cred.id);
                    }
                }

                // ステップ3: ブラウザのWebAuthn APIを呼び出し、認証を要求
                const credential = await navigator.credentials.get({ publicKey: options });

                // ステップ4: 認証情報をサーバーが検証できる形式に変換
                const credentialForServer = {
                    id: credential.id,
                    rawId: arrayBufferToBase64(credential.rawId),
                    type: credential.type,
                    response: {
                        authenticatorData: arrayBufferToBase64(credential.response.authenticatorData),
                        clientDataJSON: arrayBufferToBase64(credential.response.clientDataJSON),
                        signature: arrayBufferToBase64(credential.response.signature),
                        userHandle: credential.response.userHandle ? arrayBufferToBase64(credential.response.userHandle) : null,
                    },
                };

                // ステップ5: サーバーに認証情報を送り、検証を依頼
                const verificationResp = await fetch('/verify-authentication', {
                    method: 'POST',
                    headers: { 'Content-Type': 'application/json' },
                    body: JSON.stringify(credentialForServer),
                });
                const verificationJSON = await verificationResp.json();

                // ステップ6: 検証結果に応じてページ遷移またはメッセージ表示
                if (verificationJSON && verificationJSON.success && verificationJSON.redirect_url) {
                    showMessage('Authentication successful! Redirecting...', 'success');
                    // 認証成功なら、指定されたURLにリダイレクト
                    window.location.href = verificationJSON.redirect_url;
                } else {
                    showMessage(`Authentication failed: ${verificationJSON.fail || 'Unknown error'}`, 'error');
                }
            } catch (err) {
                // エラー処理
                if (err.name === 'TypeError' && err.message.includes('is not valid JSON')) {
                    showMessage('An error occurred: The server returned an unexpected response. Please check the server logs for a crash.', 'error');
                } else {
                    showMessage(`An error occurred: ${err.message}`, 'error');
                }
            }
        });
    </script>
</body>
</html>
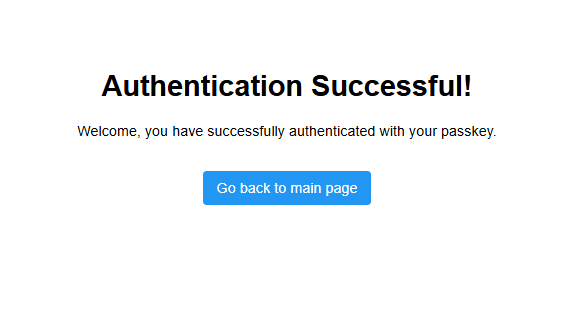
【サンプルコード:templates/welcome.html】
<!DOCTYPE html>
<html lang="en">
<head>
    <meta charset="UTF-8">
    <title>Welcome!</title>
    <style>
        body {
            font-family: Arial, sans-serif;
            max-width: 600px;
            margin: 40px auto;
            padding: 20px;
            text-align: center;
        }
        a {
            display: inline-block;
            margin-top: 20px;
            padding: 10px 15px;
            background-color: #2196f3;
            color: white;
            text-decoration: none;
            border-radius: 4px;
        }
        a:hover {
            background-color: #1976d2;
        }
    </style>
</head>
<body>
    <h1>Authentication Successful!</h1>
    <p>Welcome, you have successfully authenticated with your passkey.</p>
    <a href="/">Go back to main page</a>
</body>
</html>